
 There are interests, hobbies and crafts that we all do just for the love of the creative process it entails. Decorating is one of mine.
Though I studied Architecture and Interior Design in college, it does not compare to actually doing it in your own home, and especially for your own children!! Decorating, depending on how involved you get, can combine many creative outlets. Being the type of creative person I am- I insist on doing it all!! I enjoy learning new processes, like when we remodeled our home, I decided to learn how to tile and lay wood floors, but thats another story!
In decorating my children’s rooms, I have employed sewing, painting and furniture refinishing. I love to decorate their rooms in themes that they like, to give them a feel of owning their space in our home. Amazingly this also inspires responsibility for their rooms, which they take more pride in and try harder to keep clean. Yes! it really does work!
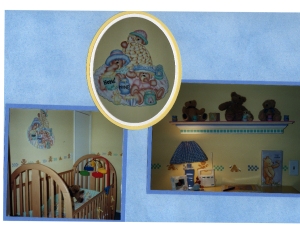
We have had many themes through- out the years: Paddington Bear Nursery, a Teddy Bear Picnic Nursery, a Garden Nursery.
Then as they grew up, for the boys, Buzz Lightyear, Woody, Harry Potter and now a Beachy/ Nautical theme due to my boys involvement in Rowing for Crew.
Many times we have used the redecorating of a childs room to help them transition into a new phase, like giving up the crib and moving onto the toddler bed
This was Andrew’s transition from the Nursery above- “Teddy Bear Picnic” to a Woody theme with a special “Woody” Toddler bed, since we needed the crib for his baby sister.
In Andrew’s Woody room I tried color washing the walls, that is why they look a different hue in places. It adds a softer touch of color and has an aged look. Then I stenciled the “Woody” motif and rope design. On the bed I used a wood graining tool to add that western feel. He was so excited about his “new” room and bed!
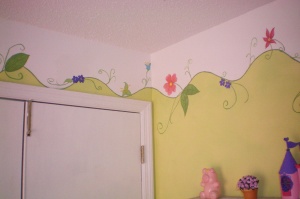
My daughter progressed to a Tinker Bell theme.
I used a wavy vine to accent the top of the wall as a boarder so that the flowers would stand out more, then I sketched out the flowers using a Tinker Bell coloring book as inspiration. These walls were also colorwashed, I just love the soft layers of color that come through with this method
Now being all of 8 years old, she is requesting a more sophisticated “Paris ” Theme, with all the Glam of course!!
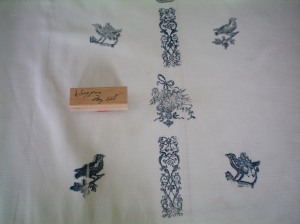
I have learned many painting techniques through-out the years; Pickling, Weathering, Glazing, Crackling, Ragging, Sponging, Color washing, Stamping, Stenciling and Woodgraining, using them on walls as well as furniture. Unfortunately, due to a computer virus we lost a lot of our family pictures, so I only have a few left to show.
Our latest transition was from a Harry Potter theme to a Beach theme.
Here we tried a new technique called “weathering” usually done on furniture, but my son wanted his walls to look like an old weathered Beach shack. Along the way through all our redecorating, I have taught my children how to do it as well. The boys started as young as three years old. There is nothing as exciting or scary as handing your three year old a loaded paint roller or brush and telling them to “go to town!”. At eight and thirteen my boys learned how to pull up carpet, nail strips and three layers of old linoleum, they loved the crow bar action!! Meanwhile my daughter was working on coloring my bedroom walls with her crayons! So she was given a paint brush too!
The only downside to inspiring my childrens creativity this way, is that they frequently come up with new ideas for their rooms. they love the process so much that they want to do it frequently!!
I am always on the look out for inspiration and ideas for decorating with new window treatments or accents that we can work on together.
These are two of my favorite books that have inpired me:
Rooms your kids will love, by Paige Gilchrist and Mary Engelbreit’s, Childrens Companion
I hope this has inspired you to collaborate with your child on a room of their dreams. I promise you it is a rewarding teaching and bonding experience. Have fun exploring your creative urges together!!
Kerry ♥


